



Common Foil Label Defects: Fill-In, Pinholes, Broken Lines and Registration
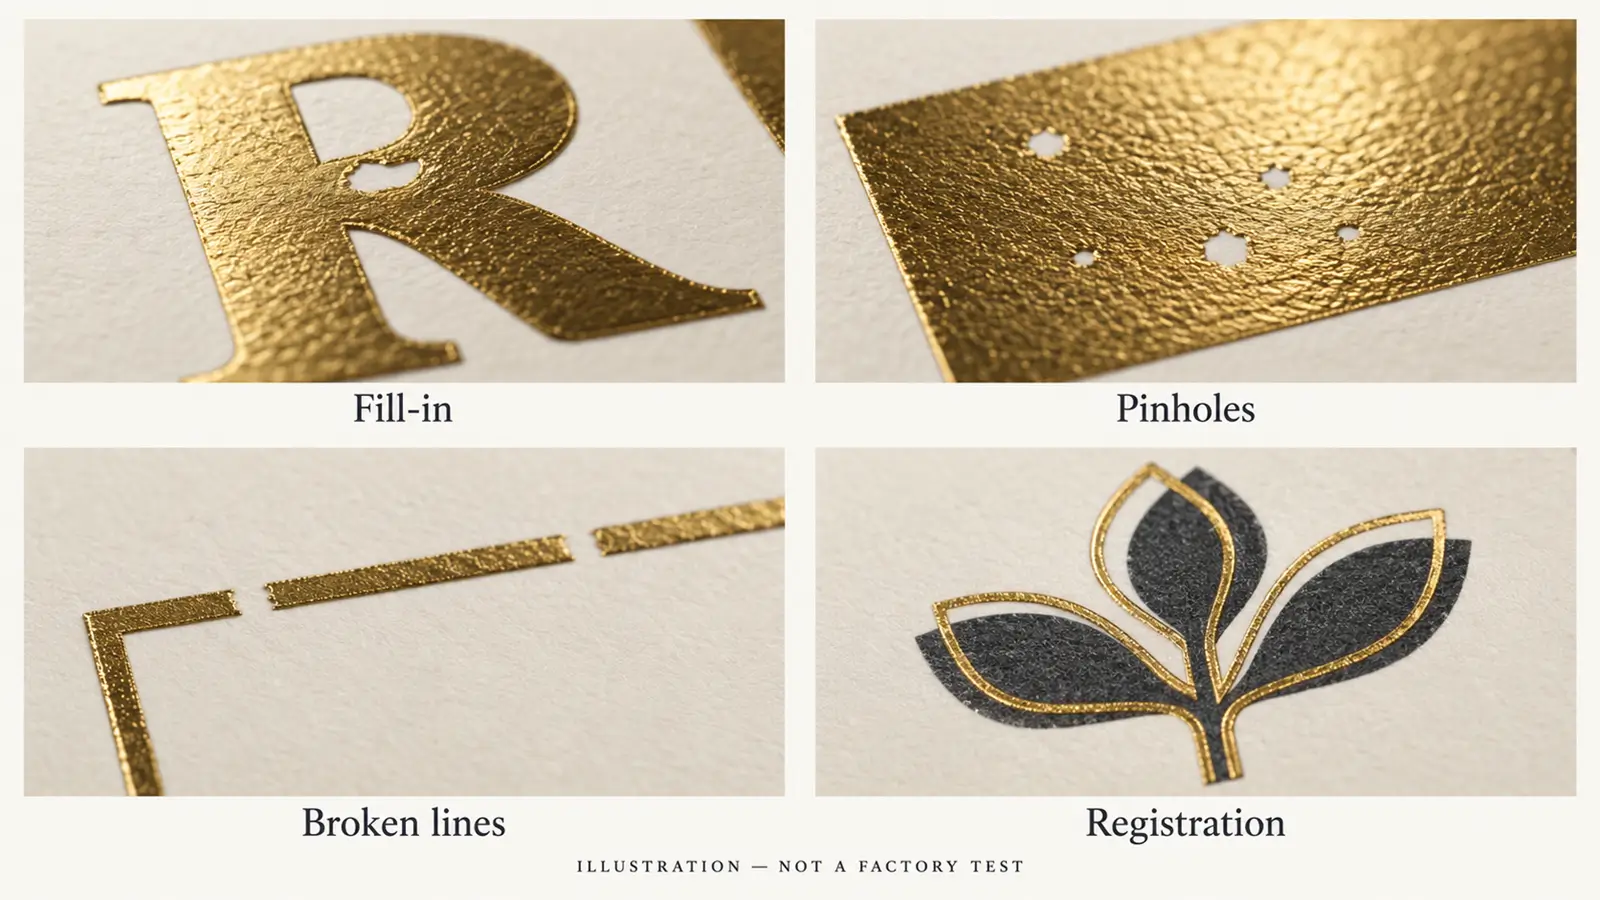
Common foil label defects come from different failure paths: unwanted transfer closes gaps, incomplete transfer leaves holes or breaks, and positioning errors shift foil relative to print. Artwork, foil grade, surface compatibility and press conditions can all matter. Identify the visible failure before changing settings; a correction for weak coverage may worsen fine detail. Supplier guidance supports checking the complete foil–material–machine combination. Foilco
For a brand approving a wine, beauty or gift label, the useful question is what must change before the next sample can be accepted. “The foil looks wrong” is too broad to diagnose remotely.
Which foil defect are you actually seeing?
Start by separating extra foil, missing foil and misplaced foil. This descriptive distinction helps prevent an alignment problem from being treated as a transfer problem. Inspect the same area on several labels, retain the original artwork, and record whether the symptom stays in one position or changes across samples.
| Defect | Visible symptom | First evidence to collect | What the appearance does not prove |
|---|---|---|---|
| Fill-in | A letter opening or narrow gap contains unwanted foil | Close-up of the gap beside the foil-only artwork | That the foil grade alone is responsible |
| Pinholes or missing spots | Small unfoiled areas interrupt a solid patch | Normal-view and magnified images of that patch | That the label adhesive is failing |
| Broken lines | A stroke or border stops where it should continue | Exact position, orientation and artwork dimensions | That every line of that width will fail |
| Registration error | Foil sits away from its intended printed position | Composite overlay and measured horizontal/vertical offset | That heat or pressure needs increasing |
These are inspection categories, not automatic diagnoses. A label can show more than one.
Photograph reflective foil from consistent angles. For clear labels, record the backing colour and whether white ink is present. Otherwise, two photographs may make the same transferred area look substantially different.
Why does fill-in close small text and gaps?
Fill-in is unwanted transfer into a space intended to remain open. Letter counters—the enclosed spaces inside characters such as “a” or “8”—and closely spaced lines deserve specific attention. Foilco identifies fine gaps as vulnerable and advises against combining extremely fine detail with very large solid areas in the same foiling artwork. Foilco Fine Detail Foiling
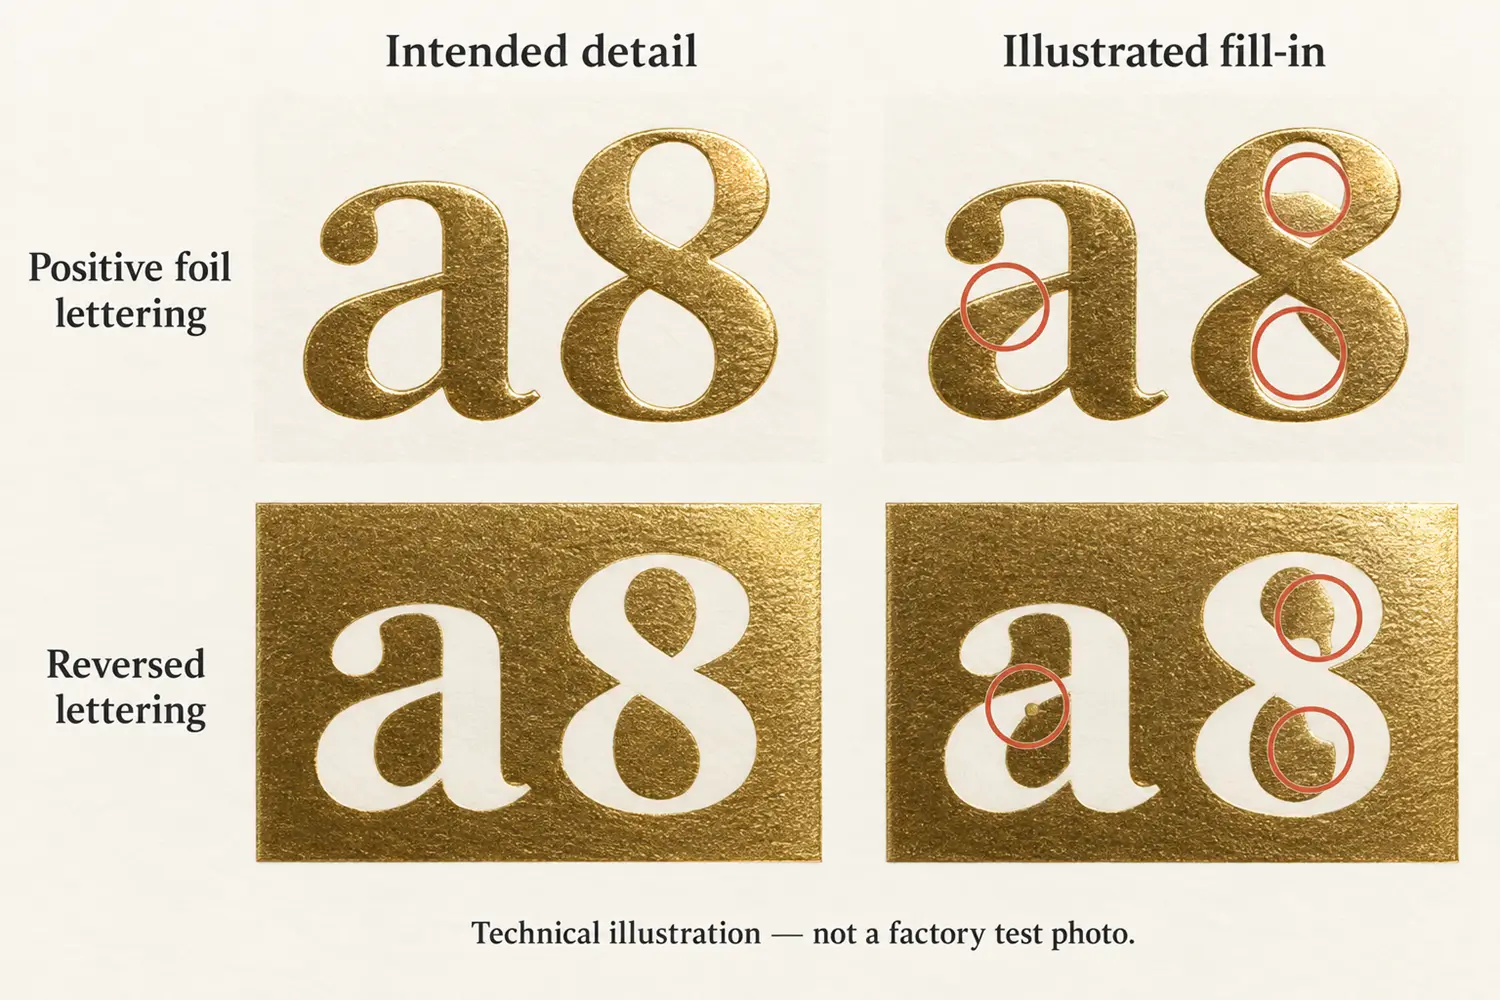
For hot stamping, excessive heat or pressure and unsuitable release behaviour are possible contributors to blurred edges. Treat those as checks for the operator, not a universal instruction to reduce both settings. Glint troubleshooting guide
For adhesive-based cold transfer, ask the converter to compare the printed adhesive image with the intended negative spaces. If the adhesive image already closes a gap, investigating that stage is more informative than blaming the final foil appearance. This is a diagnostic recommendation, not confirmation that adhesive spread caused your defect.
The design decision should be specific: widen the affected counter, increase the gap, simplify that ornament, or ask whether fine detail and solid coverage need separate treatment. A larger font size alone does not specify the geometry of its smallest opening.
Send the exact foil separation using the foil artwork preparation guide.
What causes pinholes and patchy foil coverage?
Pinholes are small interruptions in the metallic area. Possible hot-stamping causes include surface particles, defects in the foil coating and insufficient contact with surface irregularities. HCFOIL lists these as distinct checks; their similar appearance does not make them interchangeable diagnoses. HCFOIL troubleshooting
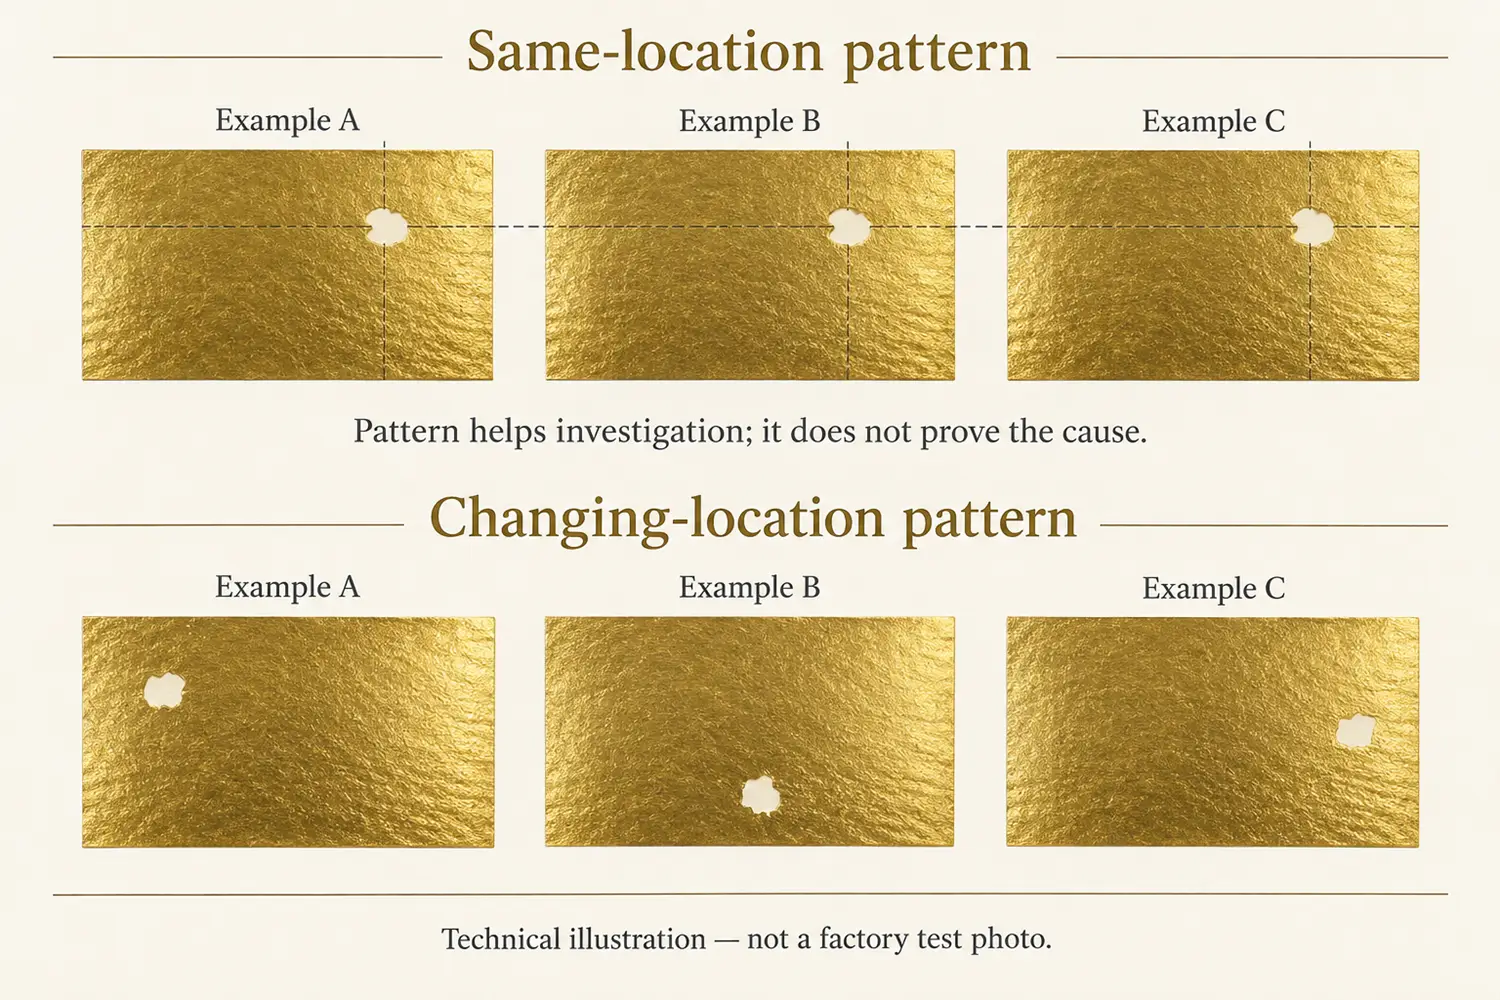
Use a repeat-location comparison:
- The void repeats at the same artwork position: ask the operator to inspect the corresponding image, tooling and contact area.
- The void moves between samples: investigate changing material, contamination or transfer conditions.
- The void is visible only under one lighting angle: confirm that it is missing transfer before recording a defect.
These patterns narrow the investigation; none establishes causation alone.
For cold foil, record the precise process. KURZ distinguishes sheet-fed offset and narrow-web systems, including different substrate, adhesive and foil requirements. A setting copied from one system is therefore not automatically suitable for another. KURZ Cold Transfer
Ask for checks on the adhesive image, transfer contact and curing conditions appropriate to that system. Avoid requesting “more adhesive” without evidence: you need the converter to show which stage fails and whether the proposed change preserves open detail.
Why do fine lines break?
A broken line is a discontinuity in a feature intended to receive foil. First confirm that the source artwork contains a continuous shape; then compare the approved file with the production image and printed sample. If the file is intact, investigate transfer and contact before declaring the design impossible.
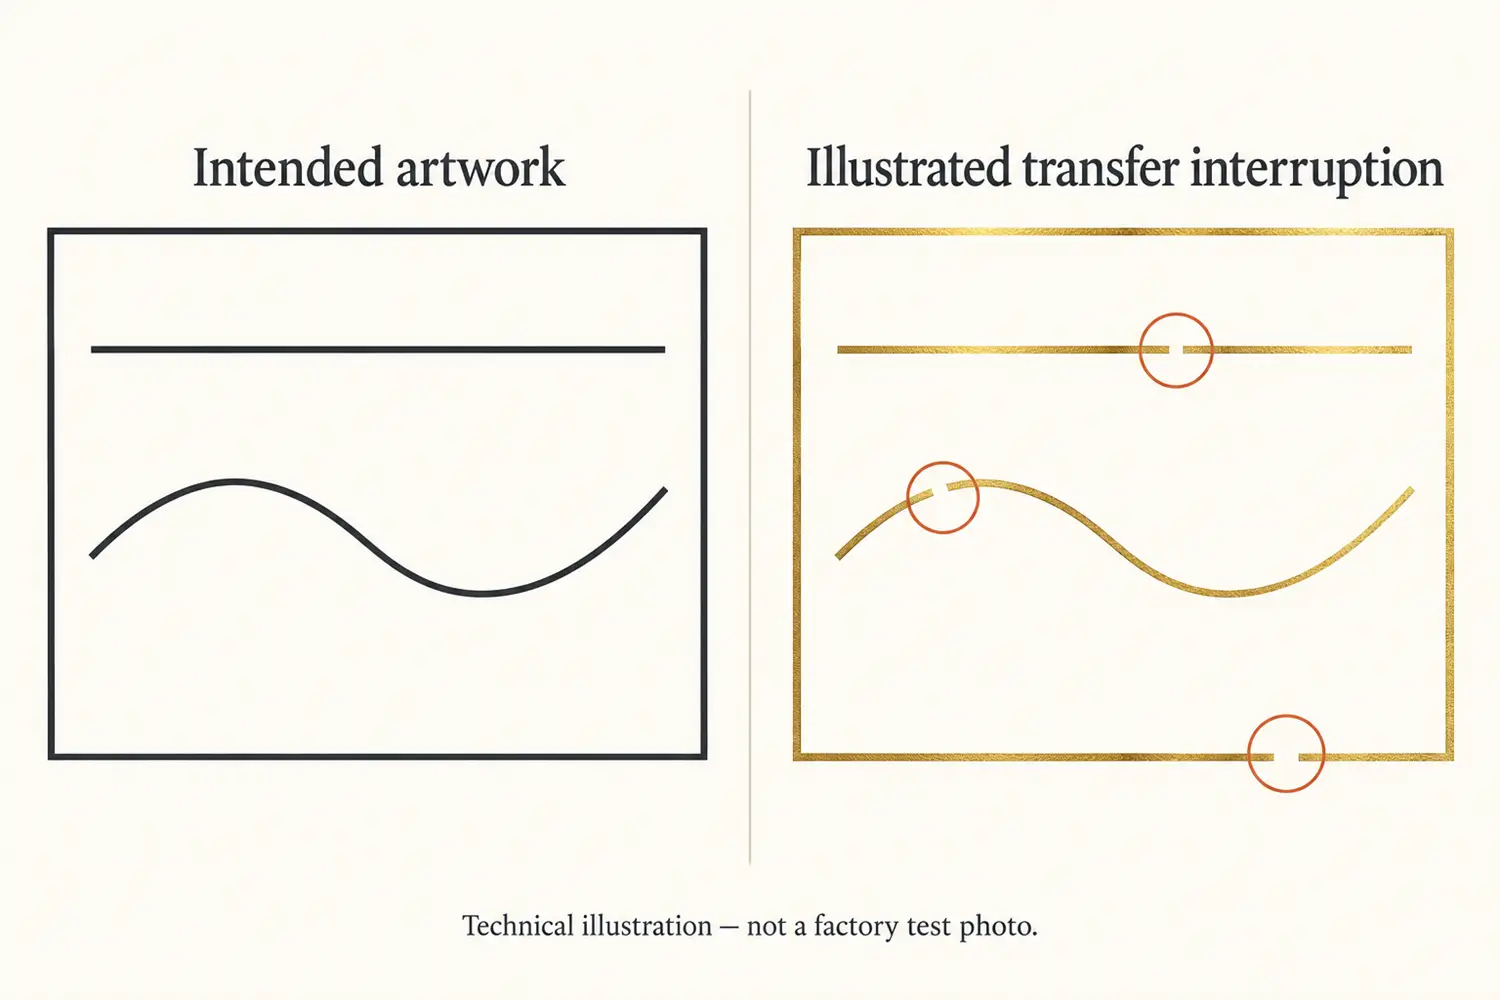
Glint lists insufficient heat, pressure or dwell, uneven die contact and substrate effects among possible causes of incomplete hot transfer. Those alternatives explain why one universal temperature prescription is unreliable. Glint troubleshooting guide
A useful test strip contains the affected line, a wider version, a reverse gap and a solid patch. Keep the material and artwork version identifiable. Ask whether a change repairs the line while preserving the gap and solid area.
Do not treat the wider line as a successful production specification simply because one sample looks good. It is a candidate for confirmation under the intended run conditions.
When considering another stock, use the foil material guide to frame the discussion, then request evidence for the actual sheet or film. A material-family name does not identify its coating, batch or foil pairing.
What causes foil-to-print registration errors?
Registration describes where the foil image lands relative to the printed design. Keep three relationships separate: foil to print, print to cutting, and a pre-existing foil pattern to its intended position. Reporting simply “off-centre” leaves the converter guessing which relationship failed.
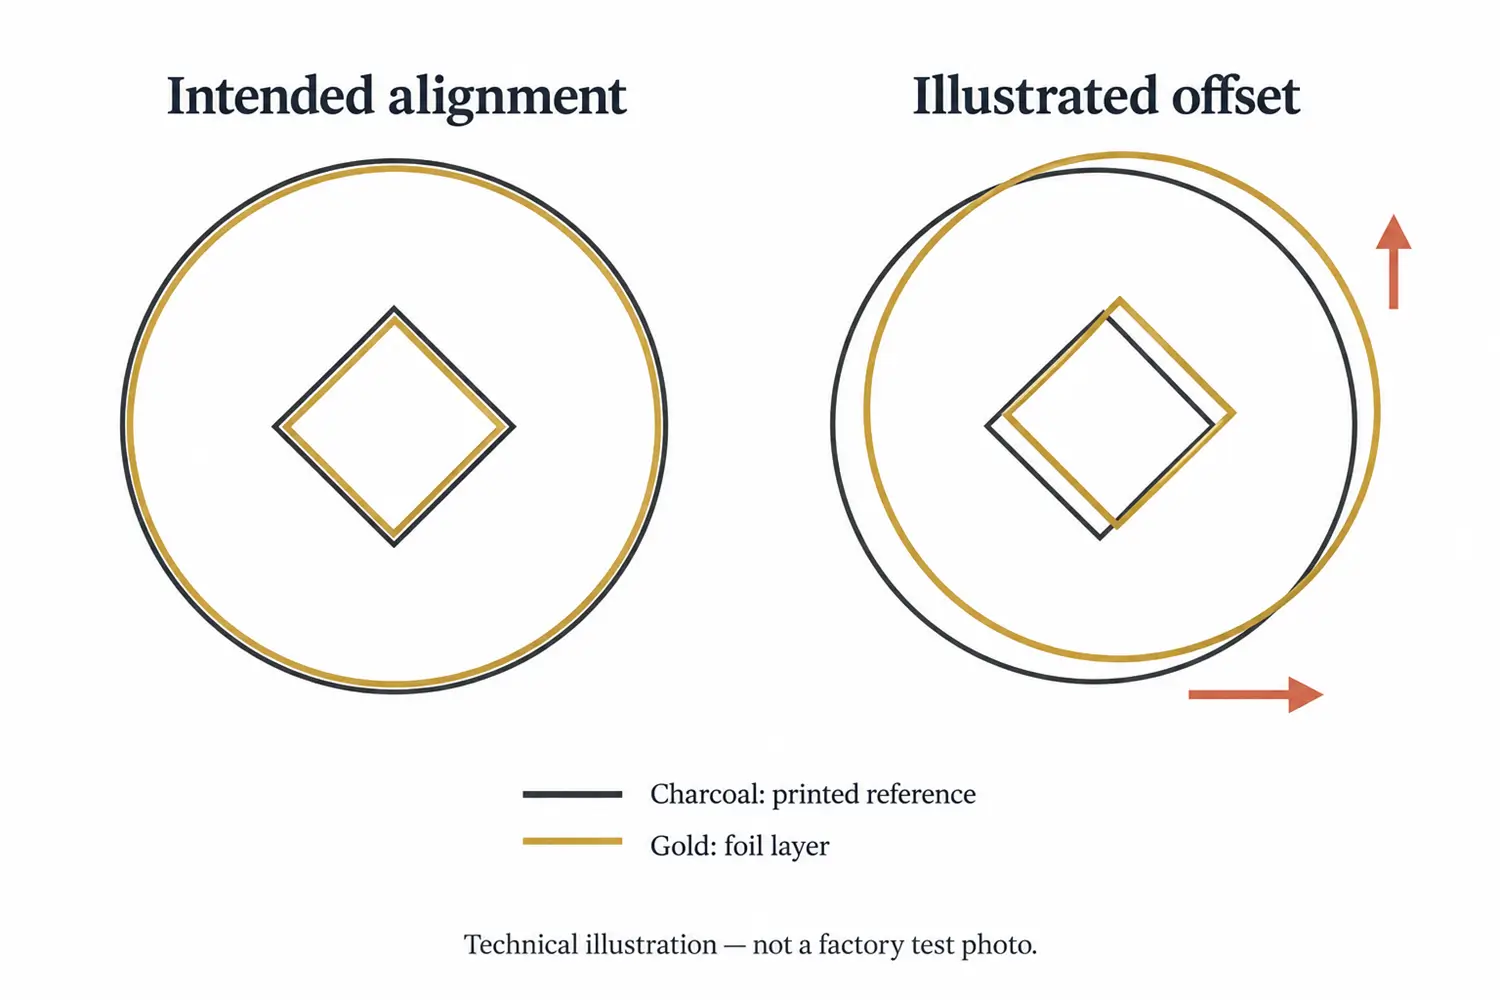
HCFOIL identifies feed calibration, dimensional changes, tension variation and loose positioning among possible misalignment causes. These are process-dependent checks, not a diagnosis from a photograph. HCFOIL troubleshooting
Registration control is a distinct machine function. For example, BOBST describes cameras that read print register marks and dynamically adjust alignment on its EXPERTFOIL 104 FR. That illustrates the control principle; it does not establish the accuracy of another press or a LabelsAgent order. BOBST EXPERTFOIL 104 FR
For the next sample, request a marked overlay showing intended and actual positions. Record offset in both directions at several positions, with units and a scale. A constant shift and a shift that changes across the sheet call for different investigations.
Agree an acceptance tolerance for the actual design with the converter. This guide does not supply a universal registration limit.
A Simulated Example: How to Read Foil Defect Records
What was simulated?
Simulated record counts
| Simulated defect code | Meaning in this dataset |
Simulated record count
|
Share of all 1,020 synthetic records |
|---|---|---|---|
| BK | Broken lines or strokes | 149 | 14.6% |
| FI | Reverse-detail fill-in | 141 | 13.8% |
| PH | Pinholes or missing foil, combined | 116 | 11.4% |
| SR | Misregistration or positional shift | 20 | 2.0% |
| RG | Jagged or rough edges | 145 | 14.2% |
| EG | Feathered edges | 83 | 8.1% |
| DB | Mottled foil appearance | 1 | 0.1% |
| Blank | No defect code assigned | 365 | 35.8% |
| Total | All simulated records | 1,020 | 100.0% |
Calculation: exact matching code count ÷ 1,020 × 100, rounded to one decimal place. The four defects discussed in this article account for 426 model-labelled records; other codes account for 229, and 365 entries are blank. No records were excluded from this summary.
What can you learn from the table?
How should you verify a proposed correction?
Use a controlled comparison with agreed acceptance criteria. Decide what the original defect is, keep a reference sample, record the proposed change, and compare the affected feature alongside adjacent features that must remain acceptable. This workflow is an author recommendation for organising a trial, not a published acceptance standard.
- Freeze the reference. Record artwork revision, material identity, foil grade, process and the sample that failed.
- State one diagnosis to test. For example: “The fine line is intact in the file, but transfer is interrupted at this position.”
- Record the intervention. Ask the operator to document the actual setting or component changed. Avoid simultaneous undocumented adjustments.
- Inspect the whole relevant area. Check whether repairing missing coverage introduces filled gaps, shifted positions or another visible problem.
- Repeat across the run. Obtain identifiable samples after stabilisation, during the run and toward its end. Keep failures as well as successes.
- Check adhesion separately. Agree the appropriate test method and acceptance criteria with the production reviewer; a visually complete image does not answer that separate question.
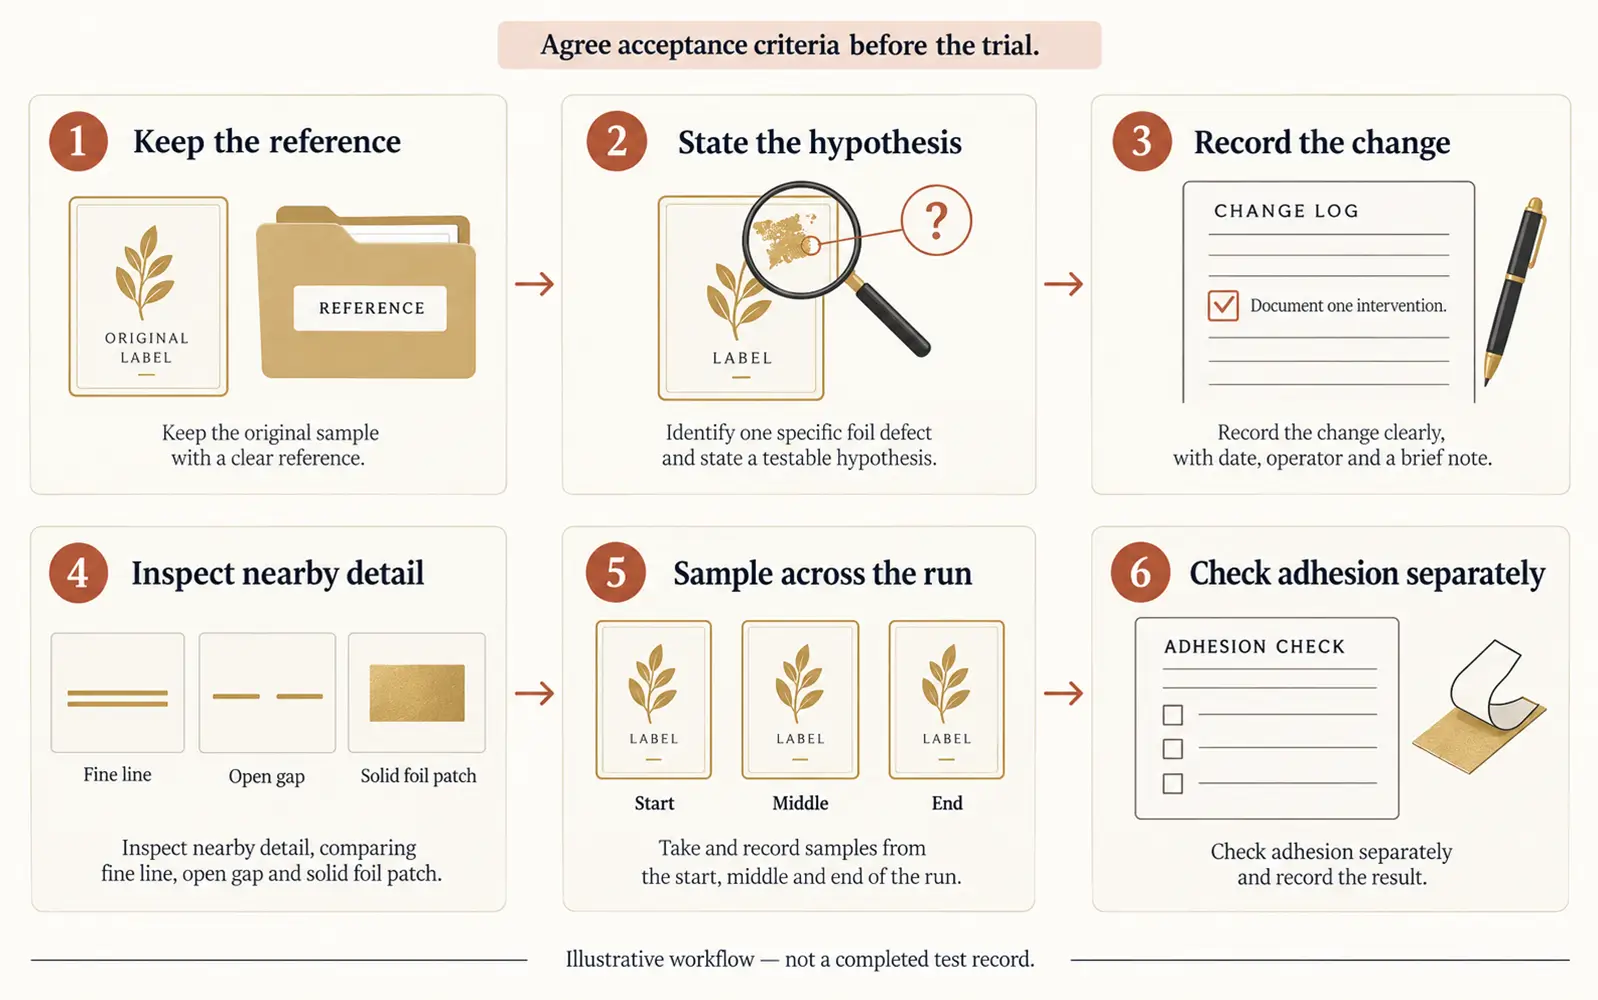
Sampling at the start, middle and end is a way to organise observations, not proof that three samples establish a commercial pass rate. Agree the required sample quantity and acceptance rules with the converter before the trial.
What should you send the converter?
Send enough information to reproduce the problem: the approved foil separation and composite artwork, a full-label photograph, a close-up with scale, exact material identification, and the sample’s production position where available. Explain whether the defect repeats. A useful request asks for the proposed correction and its verification, rather than an unsupported guarantee.
Copy this brief into your supplier message:
- Affected feature: character, border, solid patch or alignment relationship.
- Visible issue: extra, missing or misplaced foil.
- Location and frequency: sample IDs and inspected quantity, with failures retained.
- Files and photos: approved revision, intended appearance and actual result.
- Confirmation requested: suspected cause, controlled change, revised sample and acceptance criteria.
Planning a new run of custom foil labels? Include your artwork, preferred material and any previous defect photos so the proposed configuration can be reviewed before production.
FAQ
Does every pinhole mean poor foil adhesion?
Should I increase pressure when fine lines break?
Only after the operator checks why transfer is incomplete. Insufficient pressure is one possible contributor, but uneven contact and other process conditions can produce similar symptoms. Glint Request a controlled comparison and inspect neighbouring gaps as well as the broken line before accepting the adjustment.
Is cold foil always better for small details?
No universal winner is established here. KURZ describes fine-detail applications, but also distinguishes cold-transfer systems with different material and adhesive requirements. KURZ Ask for a sample using your actual artwork and proposed stock. A process name or simulated material ranking does not establish that combination’s production capability.
Can a simulated result justify approving production?
Sources and Method Notes