
How to Approve a Foil Label Proof Before Production
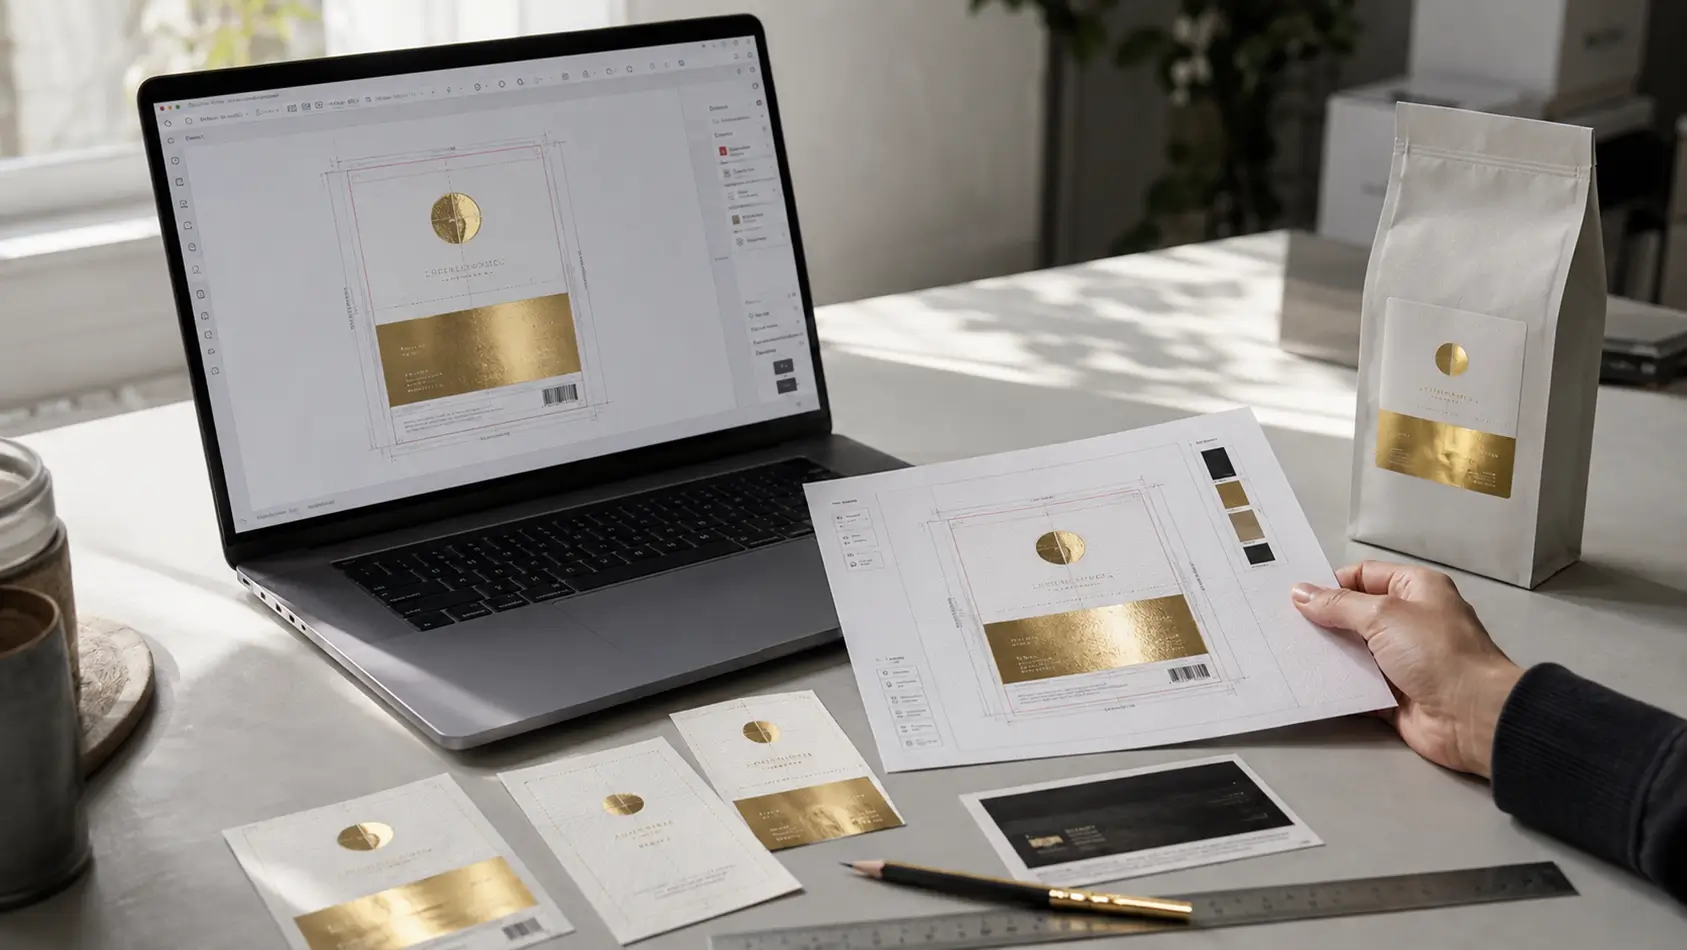
Before approving a foil label proof, confirm three things separately: the content is correct, the production geometry is correct, and the physical finish you expect is realistic. Check the final size, text, trim and safe areas, foil placement, fine details, material, foil specification, and every SKU or code. Remember that a digital proof can show position and layout far better than it can reproduce metallic shine, texture, or real-world foil behavior.[1][3]
Approving a proof is more than confirming that the design “looks right.”
For foil labels, the proof is the final checkpoint between editable artwork and production. A normal printing error might affect color or positioning. A foil-related error can also affect a separate foil layer, die or foil application, which makes overlooked problems more expensive to correct after production starts.
The safest way to review a proof is therefore to treat it as three approvals:
- Content approval — is every word, number and version correct?
- Production approval — are size, trim, foil placement and artwork geometry correct?
- Appearance approval — do you have enough evidence to accept the material, foil tone and finished effect?
A digital PDF is strong evidence for the first two. It is much weaker evidence for the third.
1. Confirm the Production Specification Before Reviewing the Artwork
Do not start by zooming into the logo.
Before approving the substrate shown on the proof, use our foil label material guide to confirm that the selected material suits the packaging surface and intended use.
First confirm that the proof describes the product you actually ordered.
Check:
- finished label width and height;
- shape;
- material;
- roll, sheet or individual sticker format;
- foil method where specified;
- foil tone;
- orientation;
- quantity and number of artwork versions;
- roll unwind direction if labels will be machine applied.
For a foil job, the specification and the visual proof should be treated as one approval package. A perfectly positioned logo is irrelevant if the proof is for the wrong label size or material.
LabelsAgent’s current gold foil configurator, for example, distinguishes format, size, material, foil method and foil selection as separate production choices.[4] That is a useful reminder that approving the artwork alone does not necessarily approve the entire manufacturing specification.
Use the Actual Packaging as Your Size Reference
Do not approve dimensions only because they match your Illustrator file.
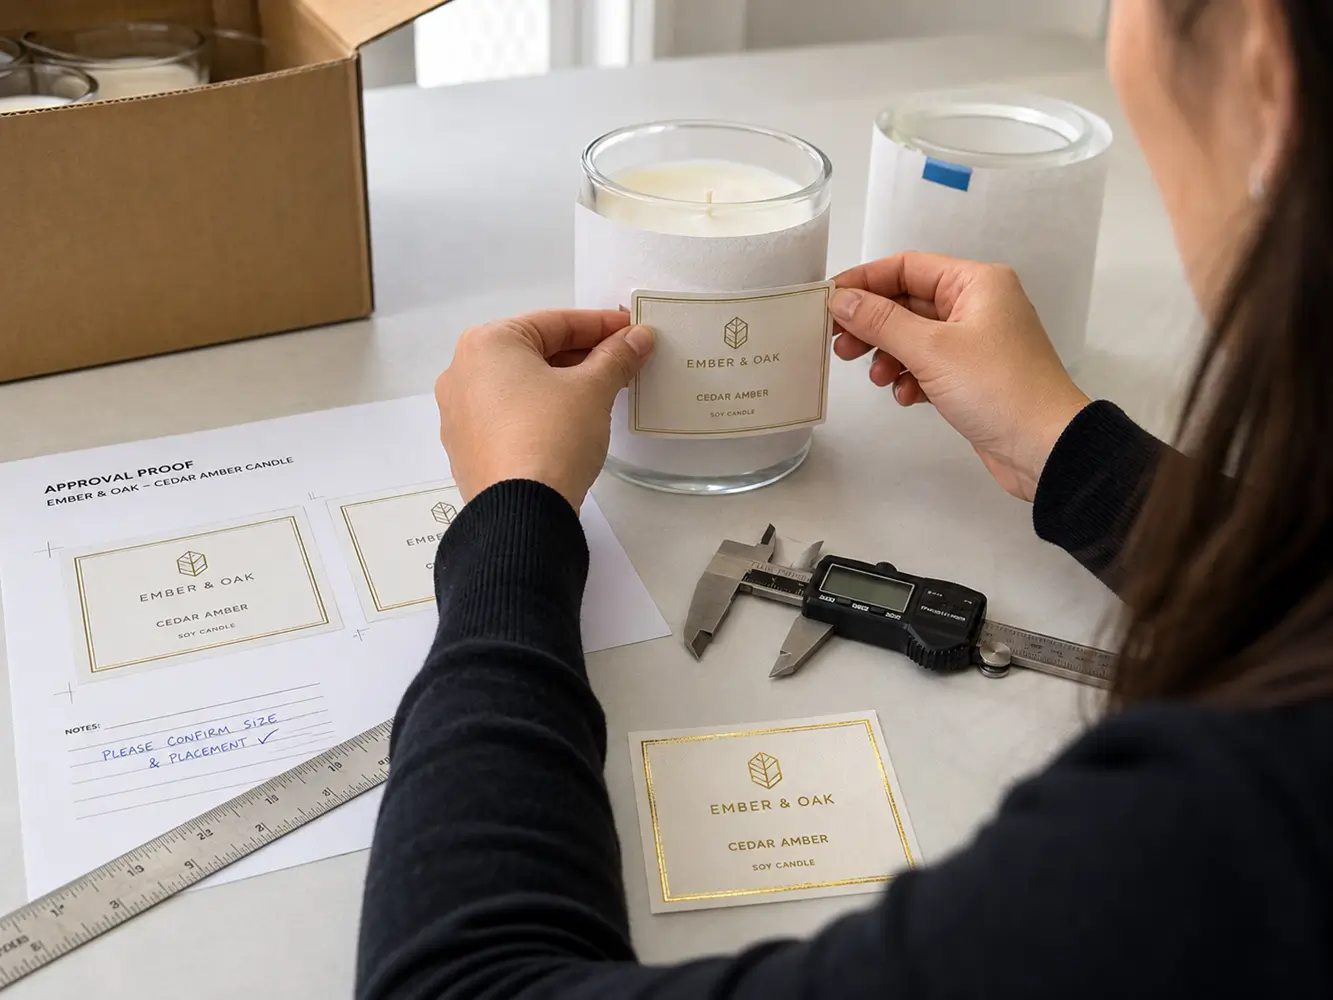
Compare the stated finished size with the bottle, jar, pouch, box or container on which the label will actually be used.
For curved containers, also consider whether the available flat area is large enough for the label without extending into an aggressive curve.
If the packaging fit has not previously been tested, a physical size test using a plain paper mock-up can catch problems that a screen proof cannot.
2. Check Every Piece of Content at Final Size
Proofreading should happen before aesthetic review.
Check every:
- brand name;
- product name;
- scent, flavor or variant;
- ingredient or descriptive text;
- net quantity;
- URL;
- email address;
- batch-related field;
- SKU;
- barcode number;
- QR destination;
- punctuation mark;
- capitalization choice.
Do not assume that text copied from an earlier design is correct.
Review Every Version Individually
A four-SKU order should be treated as four separate approvals, even if 95% of the design is identical.
Variant-based errors are easy to miss because the reviewer begins recognizing the layout instead of reading the content.
A practical method is to compare the proof against a separate approved source list:
| Proof field | Compare against |
|---|---|
| Product name | Product master list |
| SKU | Inventory system |
| Size / net contents | Product specification |
| Website | Live destination |
| QR code | Actual destination |
| Variant name | Order list |
Do not simply compare one proof against another proof.
3. Check Trim, Bleed and Safe Areas
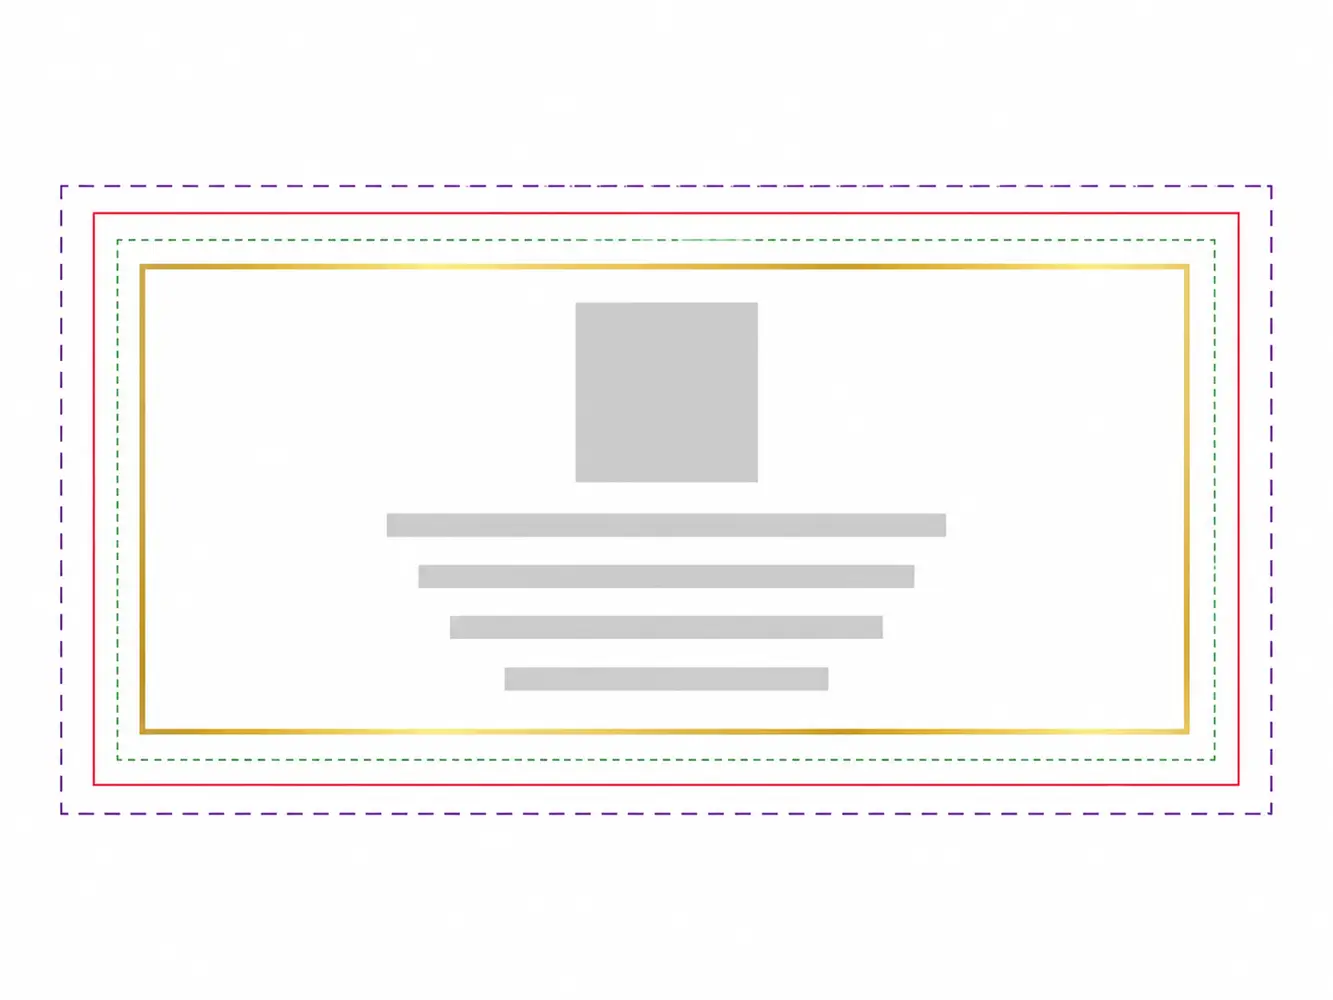
A design can look centered on screen and still be risky at the cutting stage.
The proof should make it clear where the final cut occurs and where critical content sits relative to that cut.
For file-setup requirements—including bleed, safe zones, cut lines and a separate vector foil layer—follow our foil label artwork guide.
LabelsAgent’s current foil artwork specification uses a 2 mm bleed outside the trim and a 3 mm safe zone inside the trim.[1] These are LabelsAgent production guidelines, not universal printing standards; another printer may use different tolerances.
Before approving, make sure:
- backgrounds intended to reach the edge extend through the bleed;
- logos and critical text are comfortably inside the safe area;
- a decorative foil border is not unintentionally sitting on the cut line;
- no important element appears likely to be clipped if normal die-cut variation occurs.
Pay Extra Attention to Thin Foil Borders
A border close to the trim edge creates two visual tolerances at once:
- foil placement relative to the printed artwork;
- cutting position relative to the foil border.
Even a small difference can appear more obvious on a thin rectangular frame than on an isolated logo.
If border symmetry is critical to the design, ask the printer whether the proposed geometry is appropriate for its process rather than assuming the PDF represents micron-level production registration.
4. Inspect the Foil Layer Separately From the Printed Artwork
One of the most important checks is also one of the easiest to overlook:
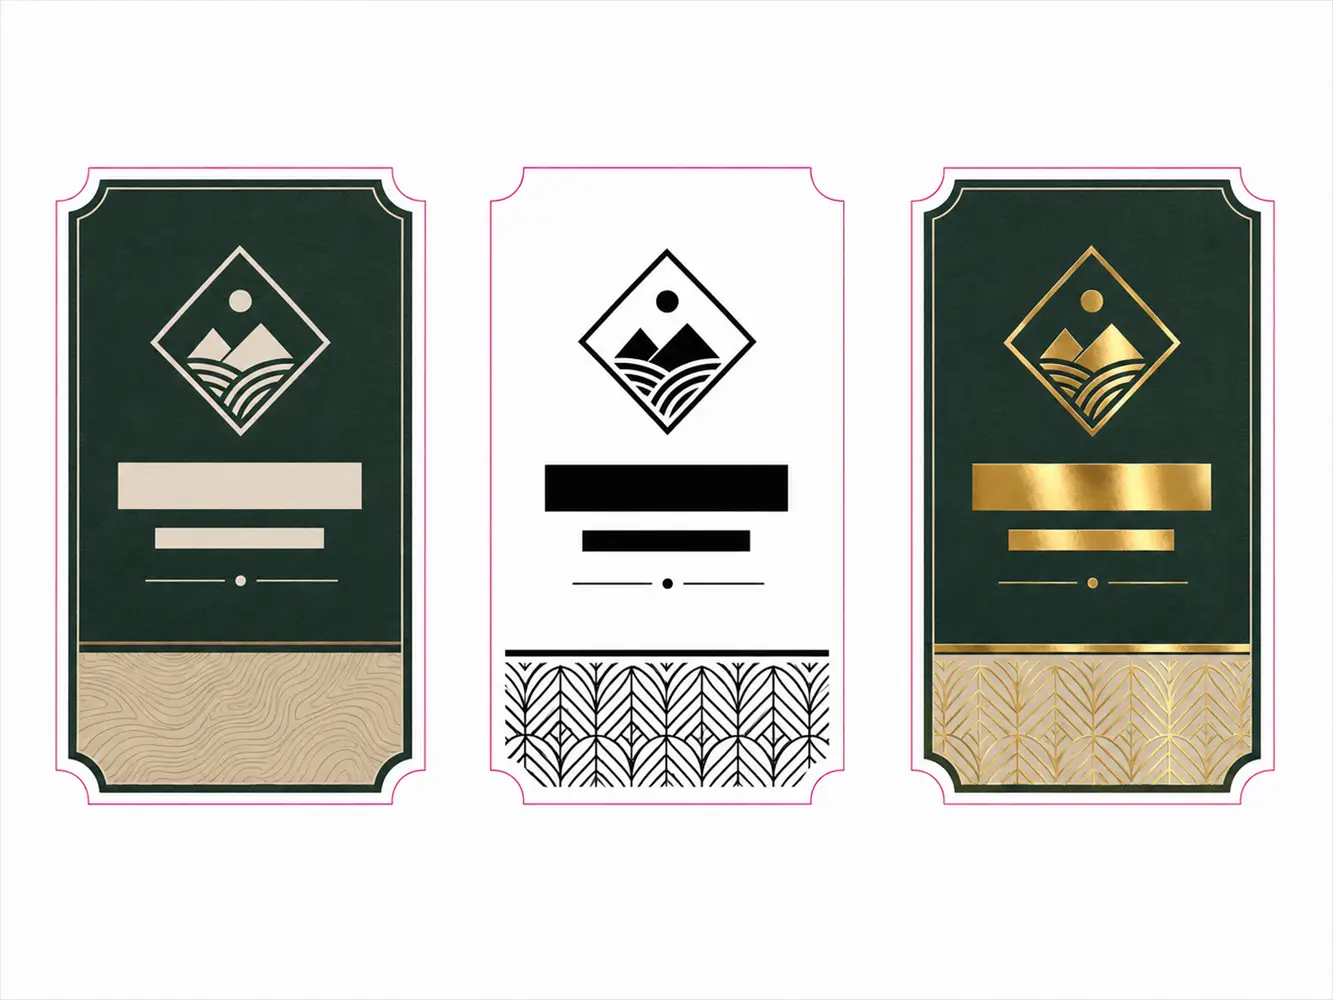
Look at exactly which elements are supposed to receive foil.
Foil artwork is normally defined separately from standard printed artwork. LabelsAgent’s artwork guide requires a separate vector foil layer, while Blue Label Packaging similarly instructs designers to identify foil elements clearly and keep them in their own layer.[1][2]
Your proof should therefore let you determine:
- what is printed only;
- what is foil only;
- what overlaps print and foil;
- where the die-cut sits;
- whether any element was accidentally added to or removed from the foil mask.
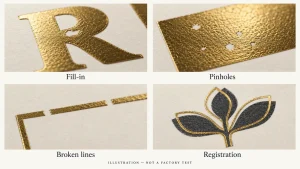
Check individual letters carefully.
A missing dot over an “i,” a small part of a crest, or an unintended foil element may be difficult to notice in a full-color simulated proof.
A Useful Approval Question
Ask yourself:
If all normal printing disappeared and I could see only the foil mask, would it still contain exactly the elements I intend to foil?
If the answer is unclear, request a foil-separation view before approving.
5. Stress-Test Small Text, Thin Lines and Reversed Details
Do not use one universal “minimum foil line width” copied from the internet as an absolute production rule.
Published guidance varies.
Blue Label Packaging specifies a minimum positive line thickness of 0.003 inch and a much larger 0.02-inch minimum for reversed lines in its hot-foil guidance, while noting that font suitability depends on the actual font design.[2]
Labelmakers publishes different requirements, including a minimum hot-foil line thickness of 0.008 inch and minimum recesses of 0.016 inch.[5]
The difference matters.
It shows that successful foil reproduction depends on more than one number. Foil process, die, substrate, artwork geometry and the converter’s equipment all affect what can be produced reliably.
Therefore, before approval, identify the most fragile elements in your particular design:
- fine serif strokes;
- tiny counters inside letters such as “a,” “e,” “o” and “B”;
- reversed text cut out of a solid foil area;
- thin borders;
- small logos;
- closely spaced parallel lines;
- dense decorative patterns;
- very small isolated foil shapes.
If your printer flags one of these elements, changing it before approval is usually safer than assuming that because it appears clearly in the PDF it will transfer identically in production. For the defects these details can create, consult the common foil label defects guide.
6. Review Positive and Reversed Foil as Different Problems
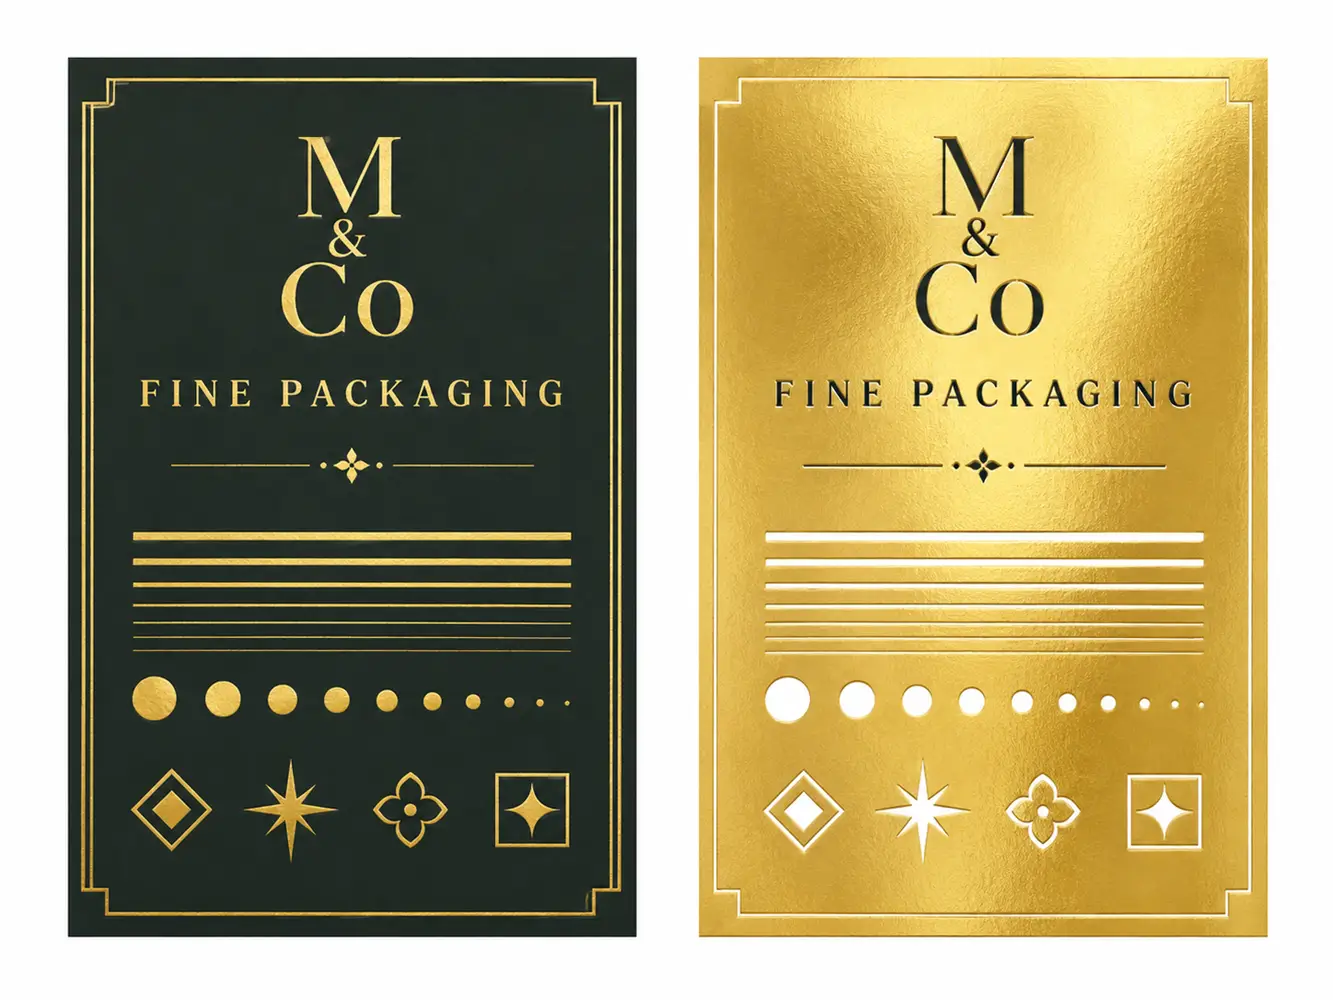
Positive foil means the foil itself forms the text, line or shape.
Reversed foil means the surrounding area is foil while the text or detail remains unfoiled.
They should not be evaluated in the same way.
Very small positive elements may fail to transfer completely.
Very narrow reversed openings can instead fill or bridge, causing holes, counters or thin negative lines to disappear. Blue Label Packaging explicitly distinguishes positive and reversed minimum line requirements for this reason.[2]
This is especially important for:
- small reversed logos;
- white lettering inside a gold foil panel;
- fine gaps inside monograms;
- thin decorative cut-outs.
If a proof contains delicate reversed foil, ask the supplier to confirm that the smallest gaps meet its own production specification.
7. Verify QR Codes, Barcodes and Machine-Readable Elements Carefully
A code that looks correct is not necessarily the same as a code that will perform correctly after manufacturing.
At proof stage, confirm:
- the encoded information is correct;
- the code has not been stretched;
- sufficient clear space remains around it;
- no decorative element interferes with it;
- the final label geometry does not place the code on a severe bottle curve or fold.
For important machine-readable information, conservative design is preferable to decorative treatment.
LabelsAgent’s artwork guidance recommends keeping QR codes and barcodes in high-contrast print rather than using foil unless the finished physical sample has been scan-verified.[1]
If scan reliability affects retail, inventory or customer access, consider the digital proof a content and placement check—not final proof of physical scanning performance.
8. Understand What a Digital Foil Proof Cannot Prove
This is the most important limitation in the approval process.
A digital proof is very useful for checking:
- text;
- size;
- placement;
- layout;
- trim;
- foil-mask location;
- version differences.
It cannot faithfully reproduce all physical properties of a finished metallic foil label.
Avery’s electronic-proof guidance states that screen proofs are useful for shape, position and layout but are not exact color matches to printed output because display appearance varies between devices.[3]
Metallic foil adds another limitation: its appearance changes with reflection, lighting angle, surface texture and material.
Therefore, do not use a PDF screenshot alone to decide whether a gold, matte, copper or holographic foil has exactly the physical appearance you want.
Request a Physical Sample When the Finish Itself Is the Decision
A physical sample becomes more valuable when:
- foil tone must coordinate with existing packaging;
- the substrate texture is important;
- the difference between gloss and matte foil matters;
- the product is positioned as premium packaging;
- a large foil area is being used;
- the label will be exposed to moisture, oil or unusual surfaces;
- this is the first production run with a new material;
- a failed production run would be expensive.
A digital proof answers:
“Is this where the foil goes?”
A physical sample is better suited to answering:
“Is this what the foil actually looks and behaves like?”
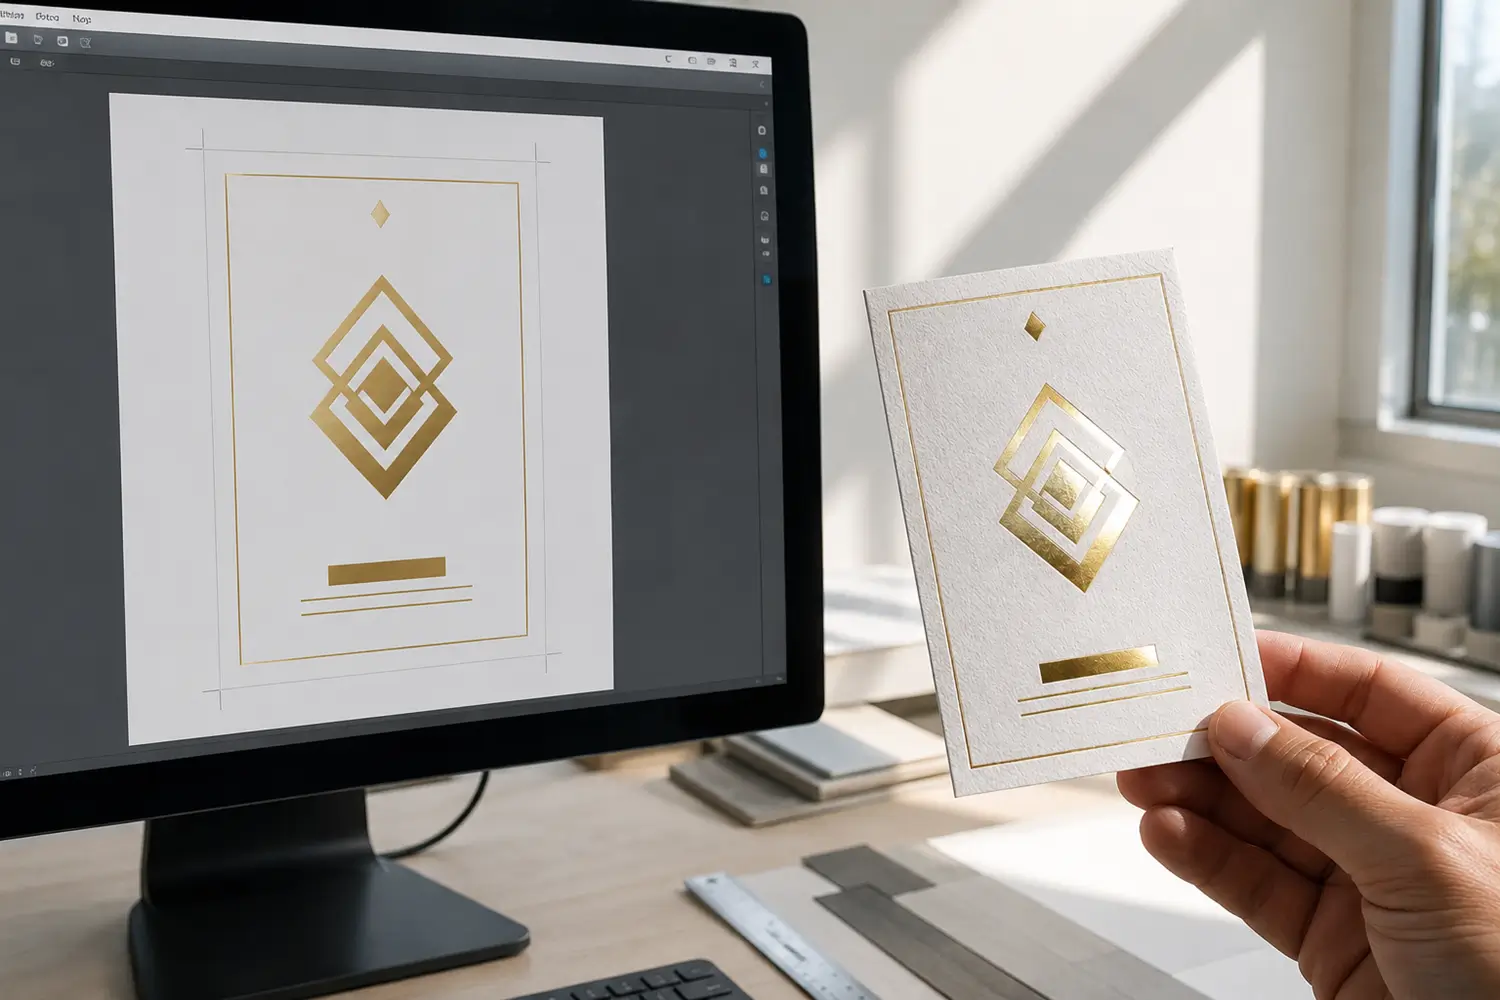
9. Use an Approve / Revise / Physical-Sample Decision
Not every uncertainty requires the same response.
| Situation | Recommended action |
|---|---|
| Text, size, foil location and specification are confirmed | Approve |
| Typo, wrong size, wrong foil mask, incorrect SKU or questionable fine detail | Request revision |
| Layout is correct but foil tone, texture or real-world appearance is still uncertain | Request physical sample |
| Proof does not clearly identify foil areas | Request clarification or revised proof |
| Critical machine-readable code has not been tested in the intended application | Consider physical production sample |
| Supplier has flagged artwork below its recommended production limit | Revise or explicitly approve the documented risk |
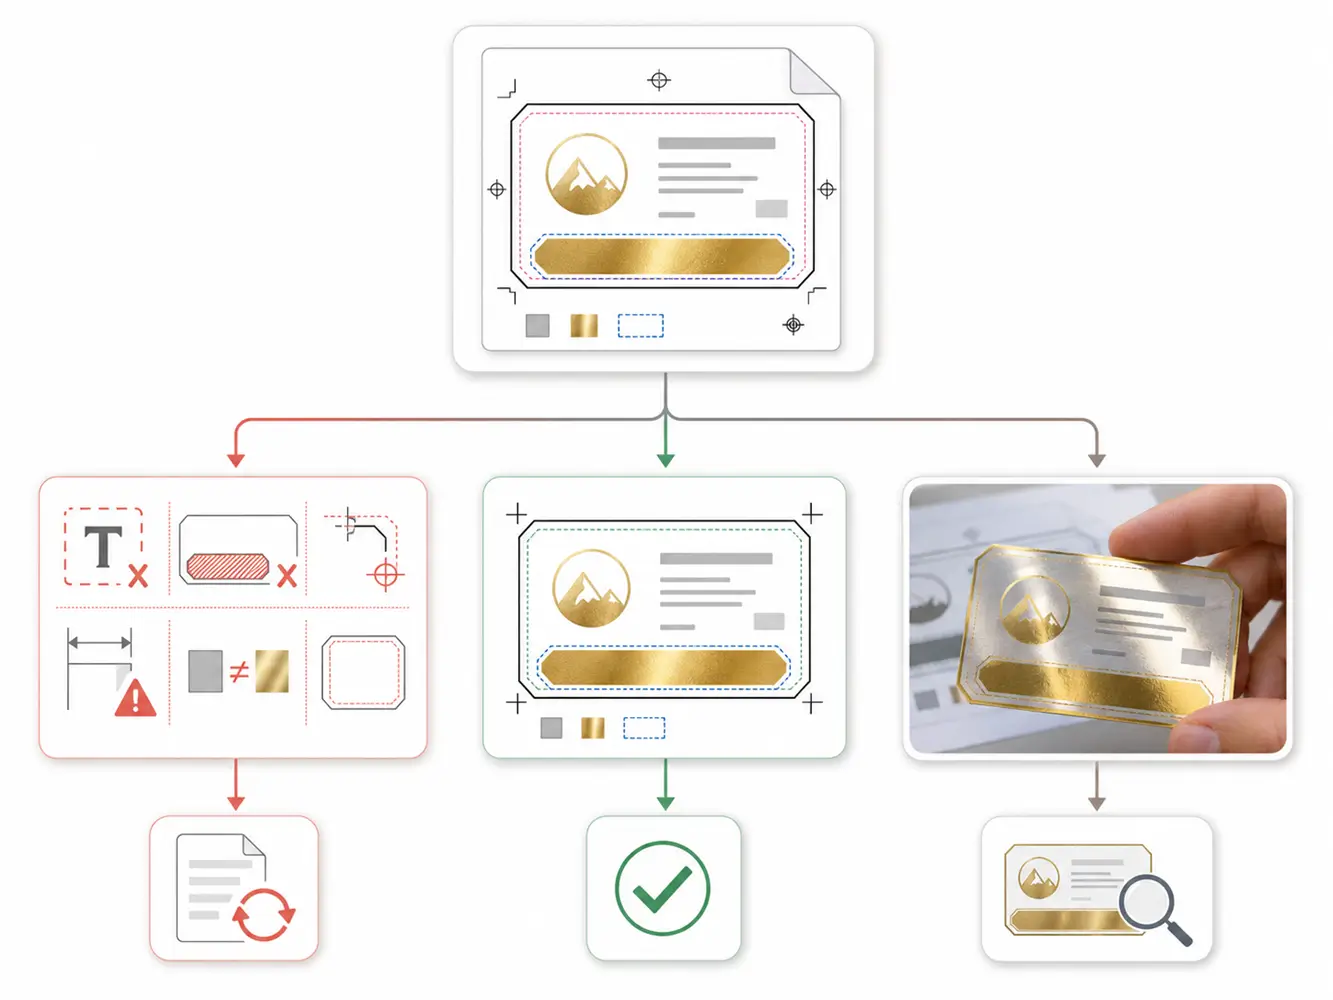
The key principle is simple:
Do not use “Approve” to resolve uncertainty.
Approval should mean the uncertainty has already been resolved.
10. Follow a Final Seven-Step Approval Routine
A practical foil-proof workflow is:
Step 1 — Confirm the Order Specification
Match size, shape, material, format, foil selection, quantity and versions to your order.
Checkpoint: The proof describes the correct physical product.
Step 2 — Read All Content
Proofread every word, number, SKU and variant independently.
Checkpoint: No placeholders or incorrect product information remain.
Step 3 — Check the Cutting Geometry
Review bleed, trim, safe areas and border placement.
Checkpoint: Critical content remains safely inside the finished label.
Step 4 — Review the Foil Mask
Identify every area receiving foil and compare it with the intended design.
Checkpoint: No missing or unintended foil elements.
Step 5 — Inspect High-Risk Foil Details
Zoom into small type, reversed detail, fine serifs, borders and dense patterns.
Checkpoint: The supplier has confirmed questionable geometry or the artwork has been revised.
Step 6 — Confirm Codes and Variants
Check QR destinations, barcode data, SKU structure and every version.
Checkpoint: Each production version is individually approved.
Step 7 — Decide Whether Digital Proofing Is Enough
Ask whether your remaining concern is about layout or about physical appearance.
Checkpoint: Request a sample if material, foil tone, texture or physical performance is still uncertain.
Final Foil Label Proof Checklist Before Production
Before clicking Approve, confirm:
- Finished label size is correct
- Shape is correct
- Material is correct
- Foil type or tone is correct
- Quantity and versions are correct
- All spelling and product information are correct
- SKUs and variable data are correct
- Bleed is present where needed
- Important content is inside the safe area
- Cut line is correctly positioned
- Foil mask contains exactly the intended elements
- Small foil text has been reviewed
- Fine positive lines have been reviewed
- Reversed foil details have enough clearance
- Thin borders have been reviewed for registration risk
- QR codes and barcodes contain the correct data
- Roll direction is confirmed if applicable
- Any printer warnings have been resolved
- You understand the limits of the digital proof
- A physical sample has been requested if physical appearance remains uncertain
For LabelsAgent foil projects, the current workflow states that a digital proof is required before production and that standard foil production begins after approval, with a stated 6–8 business-day production window.[4] That makes the proof the appropriate point to resolve artwork and specification questions rather than after the job has entered production.
Once the size, quantity, material and foil area are confirmed, request a foil label quote using the approved specification and latest artwork file.
FAQ
Can I judge the exact gold foil color from a digital proof?
No. A digital proof can indicate which foil option has been specified and where the foil will appear, but a normal screen cannot reproduce reflective metallic behavior accurately. Electronic proofs are also generally not exact printed-color references.[3] If the precise foil appearance matters, evaluate a physical foil sample on a comparable substrate.
How small can text be on a foil label?
There is no reliable universal minimum that applies to every printer, material and foil process. Published hot-foil specifications differ between converters, and font geometry matters as much as nominal point size.[2][5] Follow the production specification provided by the printer handling your job and treat fine serifs, tiny counters and reversed type as higher-risk elements.
Should I approve a proof if the printer warns that a line is too thin?
Only after the risk has been resolved or consciously accepted. A PDF can display geometry that the physical foil process may not reproduce consistently. If the line is important, the safer options are usually to increase its weight, simplify the artwork or request a suitable production test.
Do I need a physical proof for every foil label order?
Not necessarily. A digital proof may be sufficient when the material and foil combination are already known and the main purpose is to confirm layout and content. A physical sample is more valuable for a first run, new substrate, unfamiliar foil tone, large foil area or project where finish appearance is commercially important.
What happens after I approve a LabelsAgent foil proof?
LabelsAgent currently states that foil orders enter production after artwork-proof approval and lists standard foil production at 6–8 business days after approval.[4] Production time is separate from shipping transit. Confirm the current schedule for the specific order before using it as a launch-date commitment.
References
[1] LabelsAgent — Foil Label Artwork Guide: How to Prepare Files for Custom Foil Printing
Source Type: First-Party Technical / Brand Source
Used For: Foil layer setup, bleed and safe-zone guidance, proof workflow, fine-detail risk, QR/barcode recommendation
Published / Updated Date: July 13, 2026
Date Checked: August 31, 2026
URL: https://www.labelsagent.com/foil-label-artwork-guide/
[2] Blue Label Packaging — Hot Foil Stamping Embellishment Guide
Source Type: Commercial Technical Guide
Used For: Positive vs reversed foil detail, line-thickness guidance, typography and foil-layer requirements
Published / Updated Date: Not stated in document; file path dated December 2022
Date Checked: August 31, 2026
URL: https://www.bluelabelpackaging.com/wp-content/uploads/2022/12/HOT-FOIL-STAMPING-GUIDE.pdf
[3] Avery — Artwork Guidelines
Source Type: Commercial / First-Party Printer Technical Guidance
Used For: Electronic-proof capabilities, layout/position review, color-proof limitations, material and printed-proof distinction
Published / Updated Date: Not stated on page
Date Checked: August 31, 2026
URL: https://www.avery.com/custom-printing/resources/artwork-guidelines
[4] LabelsAgent — Custom Gold Foil Labels for Luxury Packaging
Source Type: First-Party Product / Commercial Source
Used For: Current foil product configuration, required proof stage and 6–8 business-day foil production after proof approval
Published / Updated Date: Not stated on page
Date Checked: August 31, 2026
URL: https://www.labelsagent.com/product/gold-foil-labels/
[5] Labelmakers — Artwork Guidelines
Source Type: Commercial Technical Guide
Used For: Alternative published hot-foil minimum line and recess guidance demonstrating converter-specific specifications
Published / Updated Date: Not stated on page
Date Checked: August 31, 2026
URL: https://labelmakers.com/artwork-guidelines/